Add New Document - Check
Accounting > Bank Documents
-
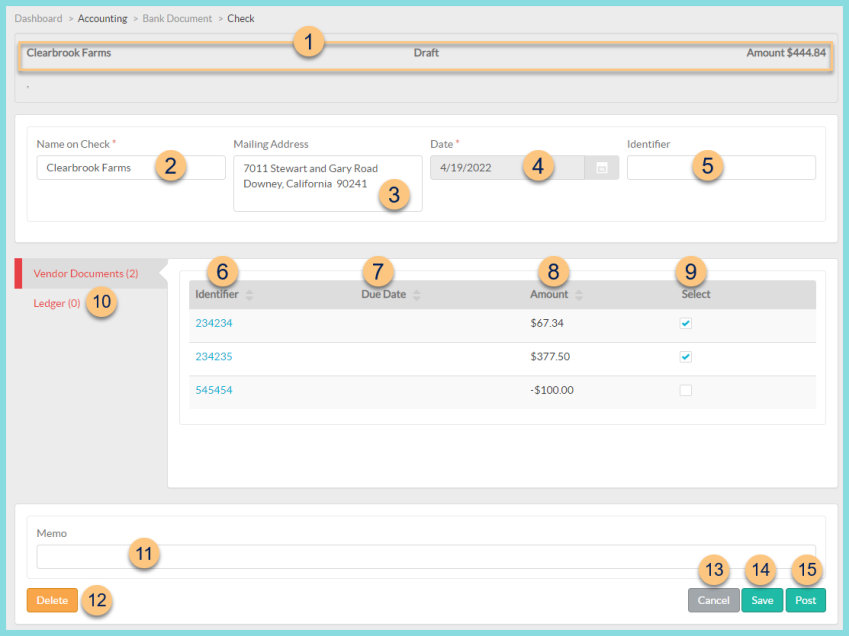
Notice the Payee Name, Status, and Amount. Click to print the Check or Check Ledger reports (not pictured, posted checks only).
-
Edit the Name on Check if needed.
Note: Head of Household will auto-populate for students. Vendor Name or Name on Check will auto-populate for vendors. -
Edit the Mailing Address if needed.
Note: Mailing Address will auto-populate from student or vendor. -
Notice the document Date.
-
Enter the document Identifier.
-
Click the Identifier column header to sort by vendor document identifier. Click an identifier to view the corresponding vendor document.
-
Click Due Date to sort by due date.
-
Click Amount to sort by dollar amount.
-
Check Select to add the vendor document to this check.
-
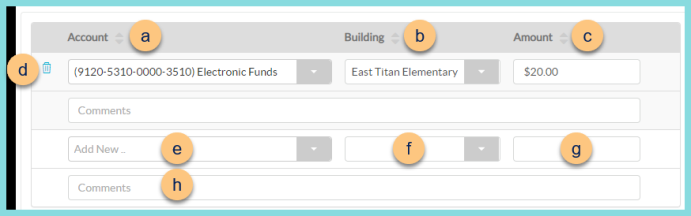
Click Ledger (#) to enter ledger items if needed.
-
Click Account to sort by account.
-
Click Building to sort by building.
-
Click Amount to sort by amount.
-
Click the Trash Can to delete line item if needed.
-
Select the account from the Add New drop-down list.
-
Select the Building.
-
Enter the Amount.
Note: Once an amount has been entered, additional ledger lines will open for use if needed. -
Enter Comments as needed.
-
Enter check Memo.
Click the To Be Printed check box (not pictured, available after posting) to include the check in the next check run.
Note: Upon printing, the box will become unchecked so as not to be included in future check runs. -
Click Delete to delete the unposted check document.
Click Void (not pictured, posted checks only) to void the check. -
Click Cancel to return to the bank documents screen without saving changes.
-
Click Save to save changes.
-
Click Post to post the check.